|
<< Click to Display Table of Contents >> Laser Detection |
  
|
|
<< Click to Display Table of Contents >> Laser Detection |
|
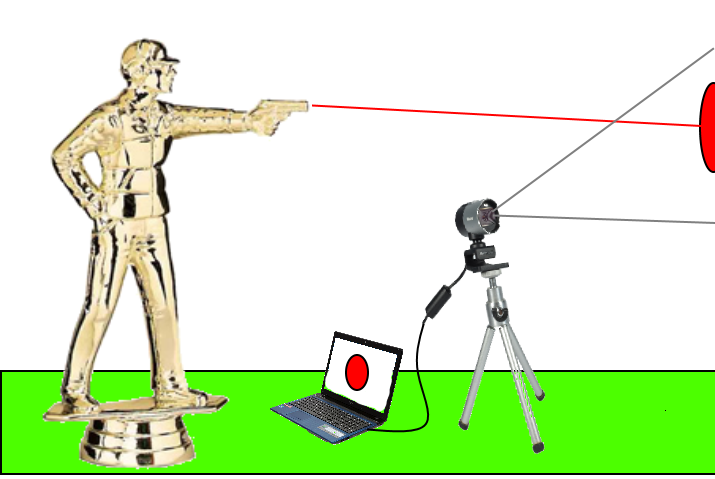
The heart of the Sharp Spotter application is the detection of laser shots.
The success of this detection will literally make or break your experience, so setting the detection thresholds properly is very important!
Setting the detection threshold is basically telling the software what the brightest point of light is in your ambient webcam feed, without any laser light (shots) present. Once this value is determined, the software will look for points of light in the video feed that exceed the threshold point, and consider these detected shots.
Before setting up detection, please ensure that your targets are in a moderate to dimly lit area.
Do not use spotlights on targets. Lighting on targets should be even without shadows, etc..
Colorless targets with a matte (non glossy) surface work well.
Colors in targets may interfere with accurate laser point detection, for example: red lasers do not work well with blue targets.
It is also a good idea to close all other applications on the PC before running Sharp Spotter.
Camera Placement
A cheap tripod works great to place the web cam high enough to get a square picture, but not so high that it is in the way.
The laptop may also be set in a chair, with the web cam clipped to the back of the chair.
Starting Camera
Once the Sharp Spotter application is up and running, select the proper camera in the camera list and click the "start cam" button.
*** The resolution selector lists all the resolutions that your camera supports. Slower PC's may require lower resolution numbers ***
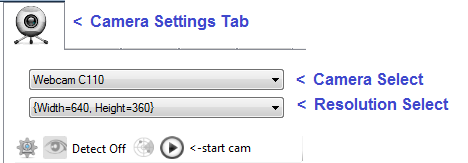
When the camera is started, the background color will turn green and the caption to the right will become an FPS (frames per second) indicator.
![]()
You can see in the example above that the FPS is running quite fast at 48. This number should be 25 or greater for good system performance.
Causes of slow FPS may include:
| • | Improper Camera |
| • | Not connected to USB 2.0 |
| • | Slow PC |
| • | Too high of resolution selected for PC's processing capability |
| • | Target area too dimly lit (sometimes causes webcam to increase exposure time internally) |
| • | Other resource-intensive applications running on the machine at the same time |
Detection Settings
Once the camera is started and running at a reasonable FPS, click the "eye" button ![]() to bring up the Detection Settings frame.
to bring up the Detection Settings frame.
The Sensitivity Sliders set the detection sensitivity to red and green light.
Lower = More Sensitive, Higher (255) = Least Sensitive
You want a balance so that ambient light is not detected and considered a hit, but true hits are also detected without being missed/skipped.
An easy way to set up these settings is to use a cheap laser pointer that is the same color as your laser ammo.
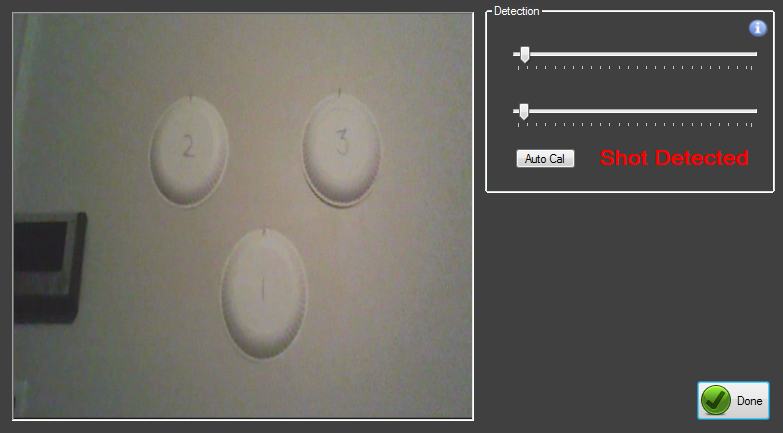
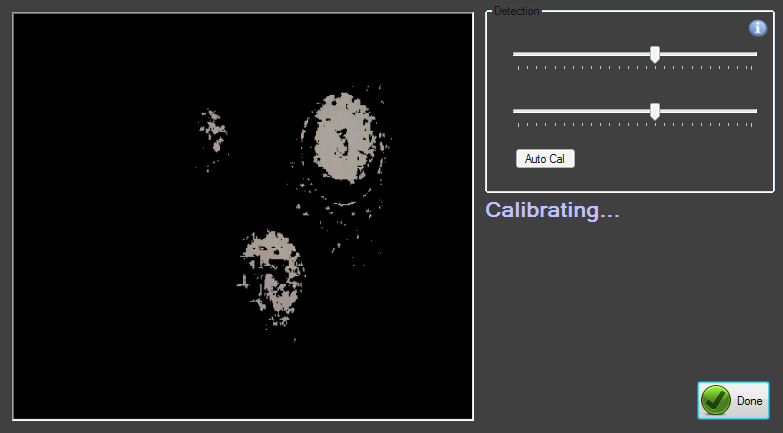
The above example has the detection sliders set too low, so that you may see the image of three paper plate targets hung on a bedroom wall.
Simple process for setting detection thresholds:
1) Click the Auto Cal button, let it find a threshold for you
2) If ambient light causes false hits to start displaying, increase the threshold values
3) *note, settings A and B are 'somewhat' proportional and depend on each other to a certain degree.
4) Use laser pointer or laser ammo to make test shots while experimenting with various levels.
The goal of this form is to calibrate the camera so that it is right on the threshold of detection/non-detection.
You want the screen to the left to be completely black, except for when a laser pulse is made within view of the camera. Clicking the Auto Cal button should be an easy way to get close.
The following pictures show what the sample frame looks like as the sliders progress toward their proper adjustment during auto calibration:
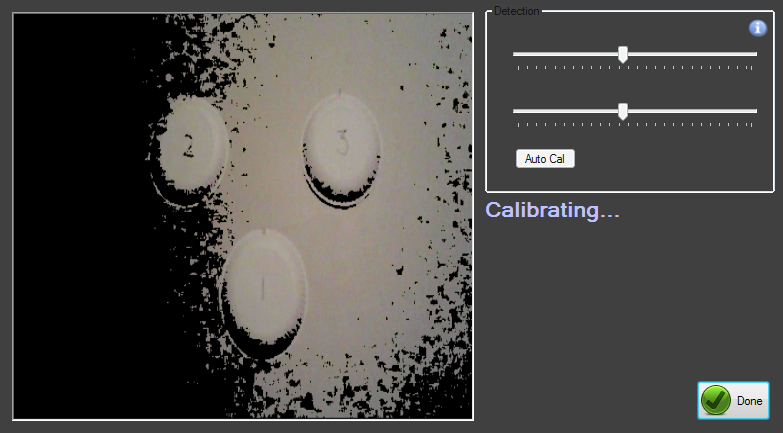
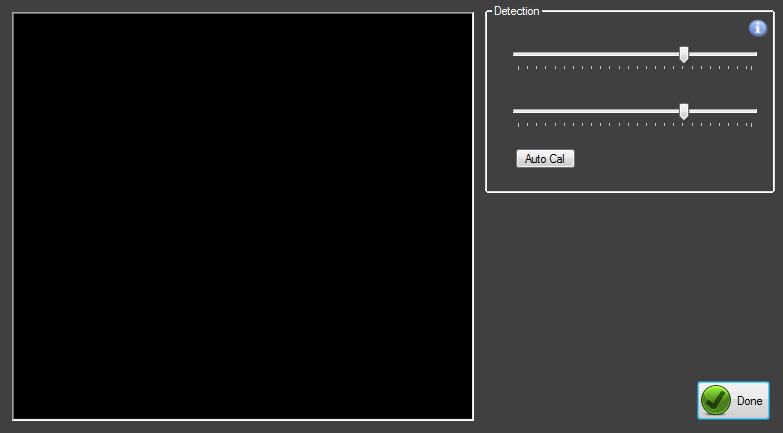
If you are unable to get the sample frame to be completely black, then the ambient light in the camera view should be dimmed.
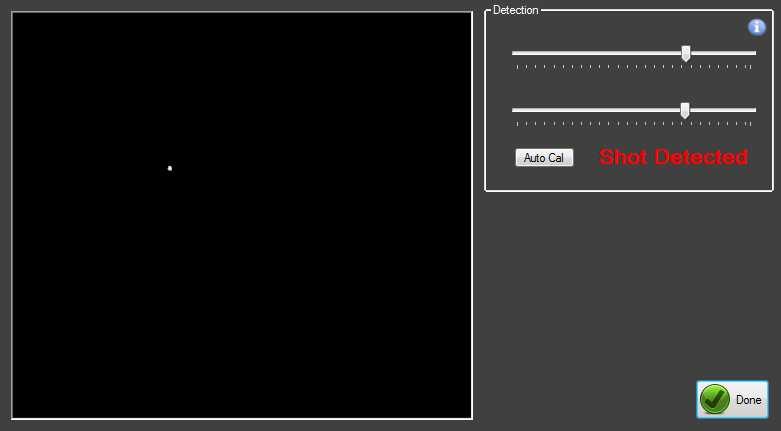
Once the sample frame is completely black, you should pause a few moments to watch for any erroneous detections. If any of these occur, the settings are still "too sensitive" and should be bumped up slightly (to the right). This is also a good time to use a laser pointer or your laser ammo to make a test shot. This should show up as a small dot on the black sample frame, and a "shot detected" caption will be momentarily displayed to let you know that the system is detecting properly.
Click "Done", and you are now calibrated.
These settings are saved, so as long as the range/target lighting remains unchanged, this will not need to be adjusted again.
Turning Detection On
Once the camera is running and the threshold is set, you may turn on detection by clicking the reticle button:
![]()
The reticle button's background color turns green to indicate that detection is now enabled:
![]()