|
<< Click to Display Table of Contents >> Zone Editor |
  
|
|
<< Click to Display Table of Contents >> Zone Editor |
|
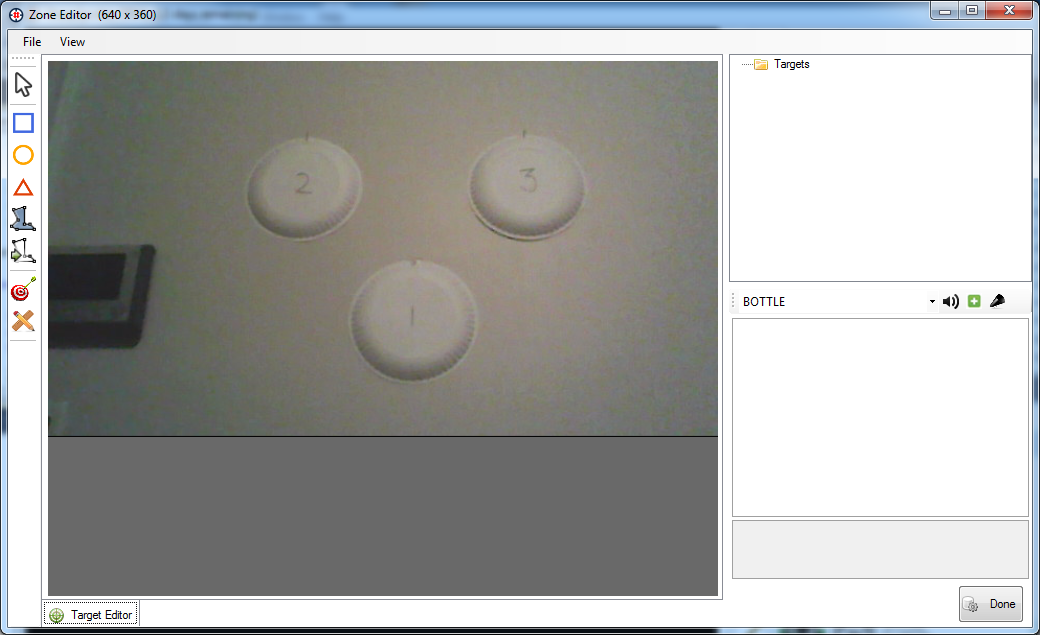
The Zone Editor is the area where you may define your targets so that Sharp Spotter knows whether you have hit or missed something.
To enter the Zone Editor, start the camera feed and click the Zone Editor button on the button bar:

Upon entering the Zone Editor, you will see a snapshot of the web camera's video feed.
Drawing Tools
![]()
Use the buttons on the toolbar to select the shape you would like to trace.
From top to bottom, the shapes are:
1) Cursor - This is for cancel/no shape desired
2) Rectangle - Drag from upper left to lower right while holding left mouse button down to create a square/rectangle
3) Ellipse - Drag from upper left to lower right while holding left mouse button down to create a circle/ellipse
4) Draw Polygon - Drag mouse while holding left button to create a polygon shape. Release mouse button to complete shape.
5) Point Polygon - Click the "corner points" of polygon one-by-one. Right click mouse to complete shape. This works great for IDPA/IPSC type targets.
Example
In this example, we have 3 paper plates hanging on a bedroom wall.
The most appropriate drawing tool will be the ellipse, so it is selected, and the left mouse button is held down while dragging from the upper-left to the lower-right of target 1.
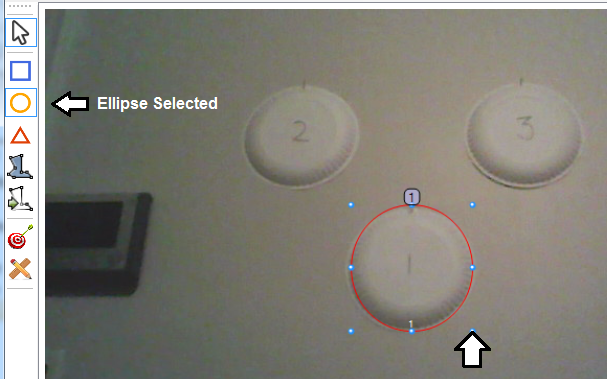
After a new zone is created, its size and shape may be changed using the "handles" in the corners of the selected object.
It may also be dragged around (relocated) by clicking and dragging the mouse.
We will repeat for targets 2 and 3:
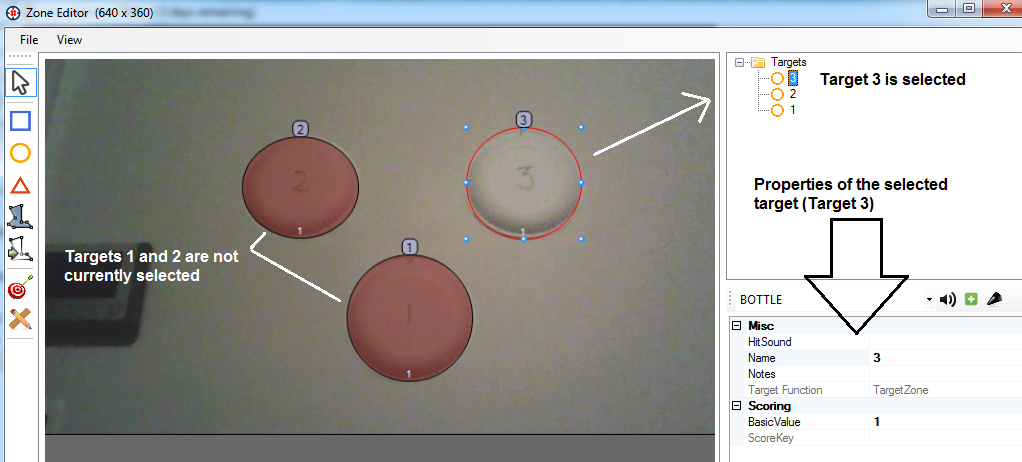 Note that as targets zones are added, they are added to the Targets Tree in the upper-right panel.
When a target is selected (either in the tree, or by clicking it in the editor), that target's properties are displayed in the lower-right panel.
These properties may be changed as desired to customize the zone's sound, score value, etc...
Target Context Menu
A selected target zone may be right-clicked to display a list of options.
The same context menu is displayed when the target zone is selected and right-clicked in the target tree.
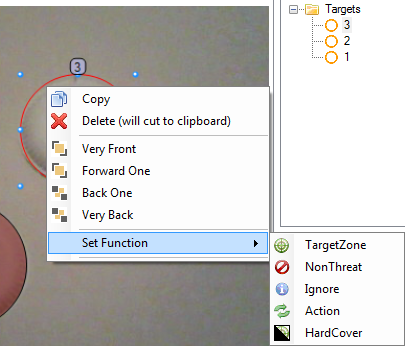
The context menu allows for moving the target zone forward and backward in the list of targets. This is useful for overlapping target zones. It ensures that overlapping zones will not be hidden because they are behind another zone. This is best illustrated with a simple example- say you have a typical concentric ring target:
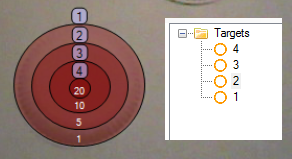
You can see that the "topmost" zone is zone 4, or the bullseye. If it were "under" the other/larger zones, it would be impossible to hit.
The ordering can be seen in the target tree, and the ordering is evident when the objects are clicked in the editor. The zones in this example have also had their score values altered, increasing as they get closer to the center.
In addition to ordering, the context menu allows for changing Zone Function.
Zone function tells the program what a particular target zone is used for.
The default is "Target Zone" which means that this is a hittable/scoreable target zone.
Other functions include:
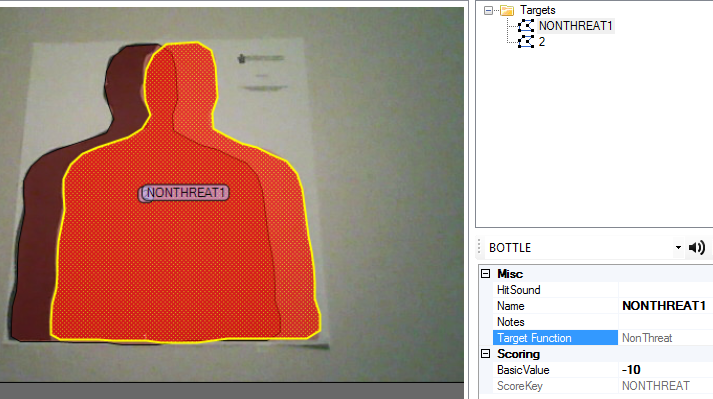
NonThreat - This is for friendly, or "do not hit" zones.
An example where this might be useful is when using a "hostage" target like so:
Ignore - This zone function will make any the selected area basically "undetectable" as far as shots go. This could be useful if an area has a bright spot that is causing false hits, etc...
Action - This zone function will cause shots on this zone to act like mouse clicks on the user interface. You may specify an action (or list or multiple actions), mainly used for Reset and Start actions.
Hard Cover - This will make a target zone act as a non-scored cover over a regular target zone. These have a different sound when hit, and may be used to handicap a target by making it more difficult to hit.
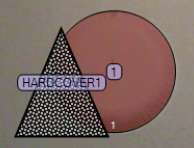 A normal target partially obscured by Hard Cover
Whenever you are finished editing in the Zone Editor, always click the Done Button:
![]()
This will save the target zones so they will be ready to go the next time the program is run.